How we created 50K Unique NFTs for Polkadot Decoded 2022 (in one month)
Blog contributors: Simon Telezhkin, Parity Technologies Visual 3D Designer Ignasi Albero, Web3 Foundation Brand Lead Hamid Alipour, Parity…
Blog contributors: Simon Telezhkin, Parity Technologies Visual 3D Designer Ignasi Albero, Web3 Foundation Brand Lead Hamid Alipour, Parity Technologies Fullstack Product Engineer
For Polkadot Decoded 2022, we came up with the idea to offer both in-person and online attendees something extra special: their own, unique NFT! Read on to learn more about this gift concept and how our team created a collection of 50,000 different avatars — representing the pluralism and innovation from the Polkadot ecosystem — all in just one month.
The idea behind the event NFTs
While everyone loves getting cool stickers at events, for Polkadot Decoded 2022, we wanted to give attendees something more unique to take home.
We chose an NFT that’s procedurally generated, allowing each attendee to have its own one-of-a-kind avatar — creating a huge collection among community members that attended Polkadot Decoded. All NFTs served as proof of attendance. We wanted to give people a collector’s item to remember the event. Therefore, the NFTs were designed to not be sold (you wouldn’t sell your wristband to your favorite music festival either, right?).
With different NFT tiers, the rarity of people’s souvenirs all depended on how early they registered. Those who were among the first 1.000 registrations had first dibs on the most unique NFTs, which they could claim via a code that was sent out per email during the Polkadot Decoded event.
How Simon designed 50K Polkadot Decoded NFTs
Having joined Parity only a few weeks prior to the event, Visual 3D Designer Simon Telezhkin was thrown right in when asked to create 50K unique NFTs for Polkadot Decoded.
He came up with a plan to create 50K NFTs in the given timeframe. Between creating, rendering, and finalizing the art, you’re easily looking at months of work — and Simon only had one month until the event.
While brainstorming time-saving processes, he thought about rendering with masks to give certain image parts a different color or opting for render farms. But both methods could result in having to create even more images, working with tons of data, or ending up with NFTs that looked too similar in shape (with color variations only).
This is how he got to pixel art — a fun stylization that suited all the NFT project requirements.
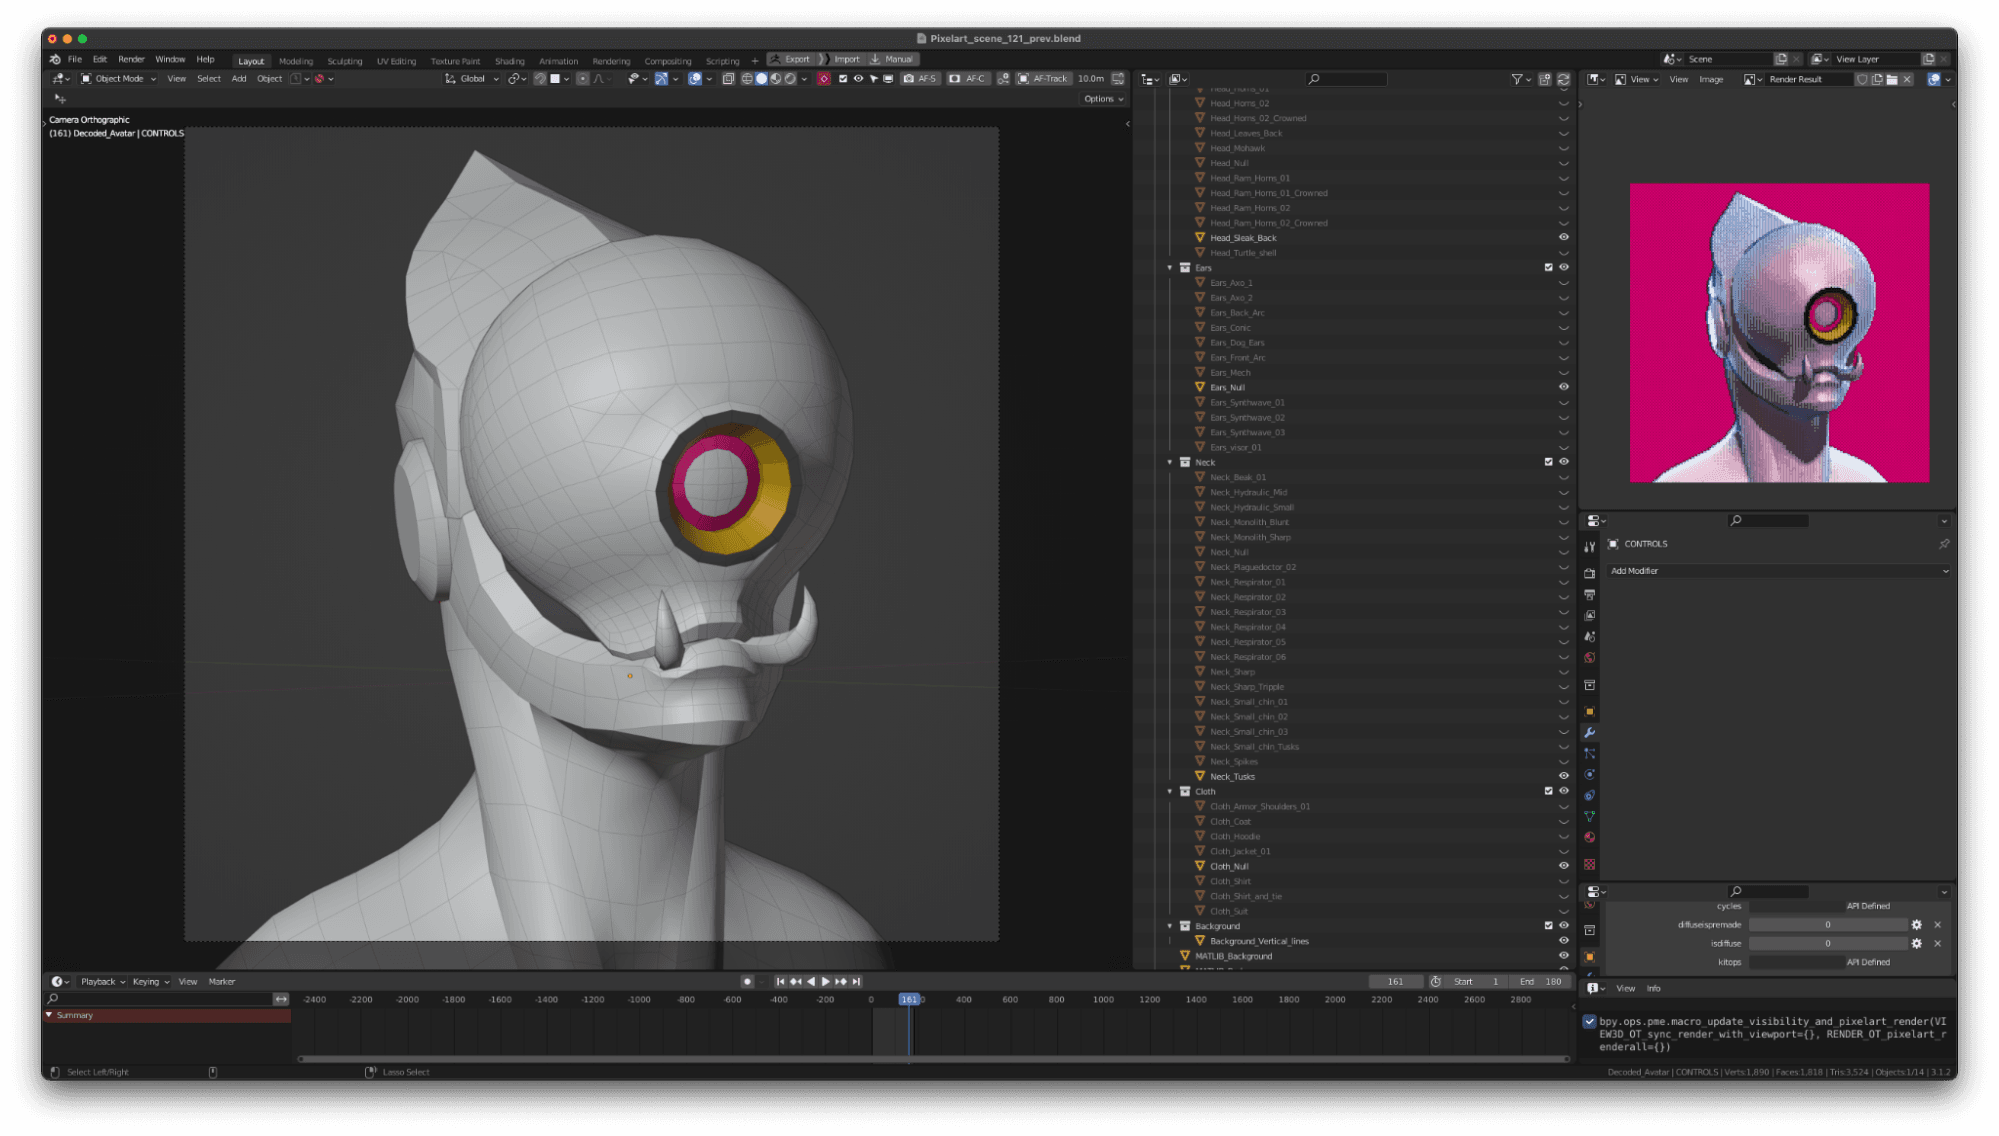
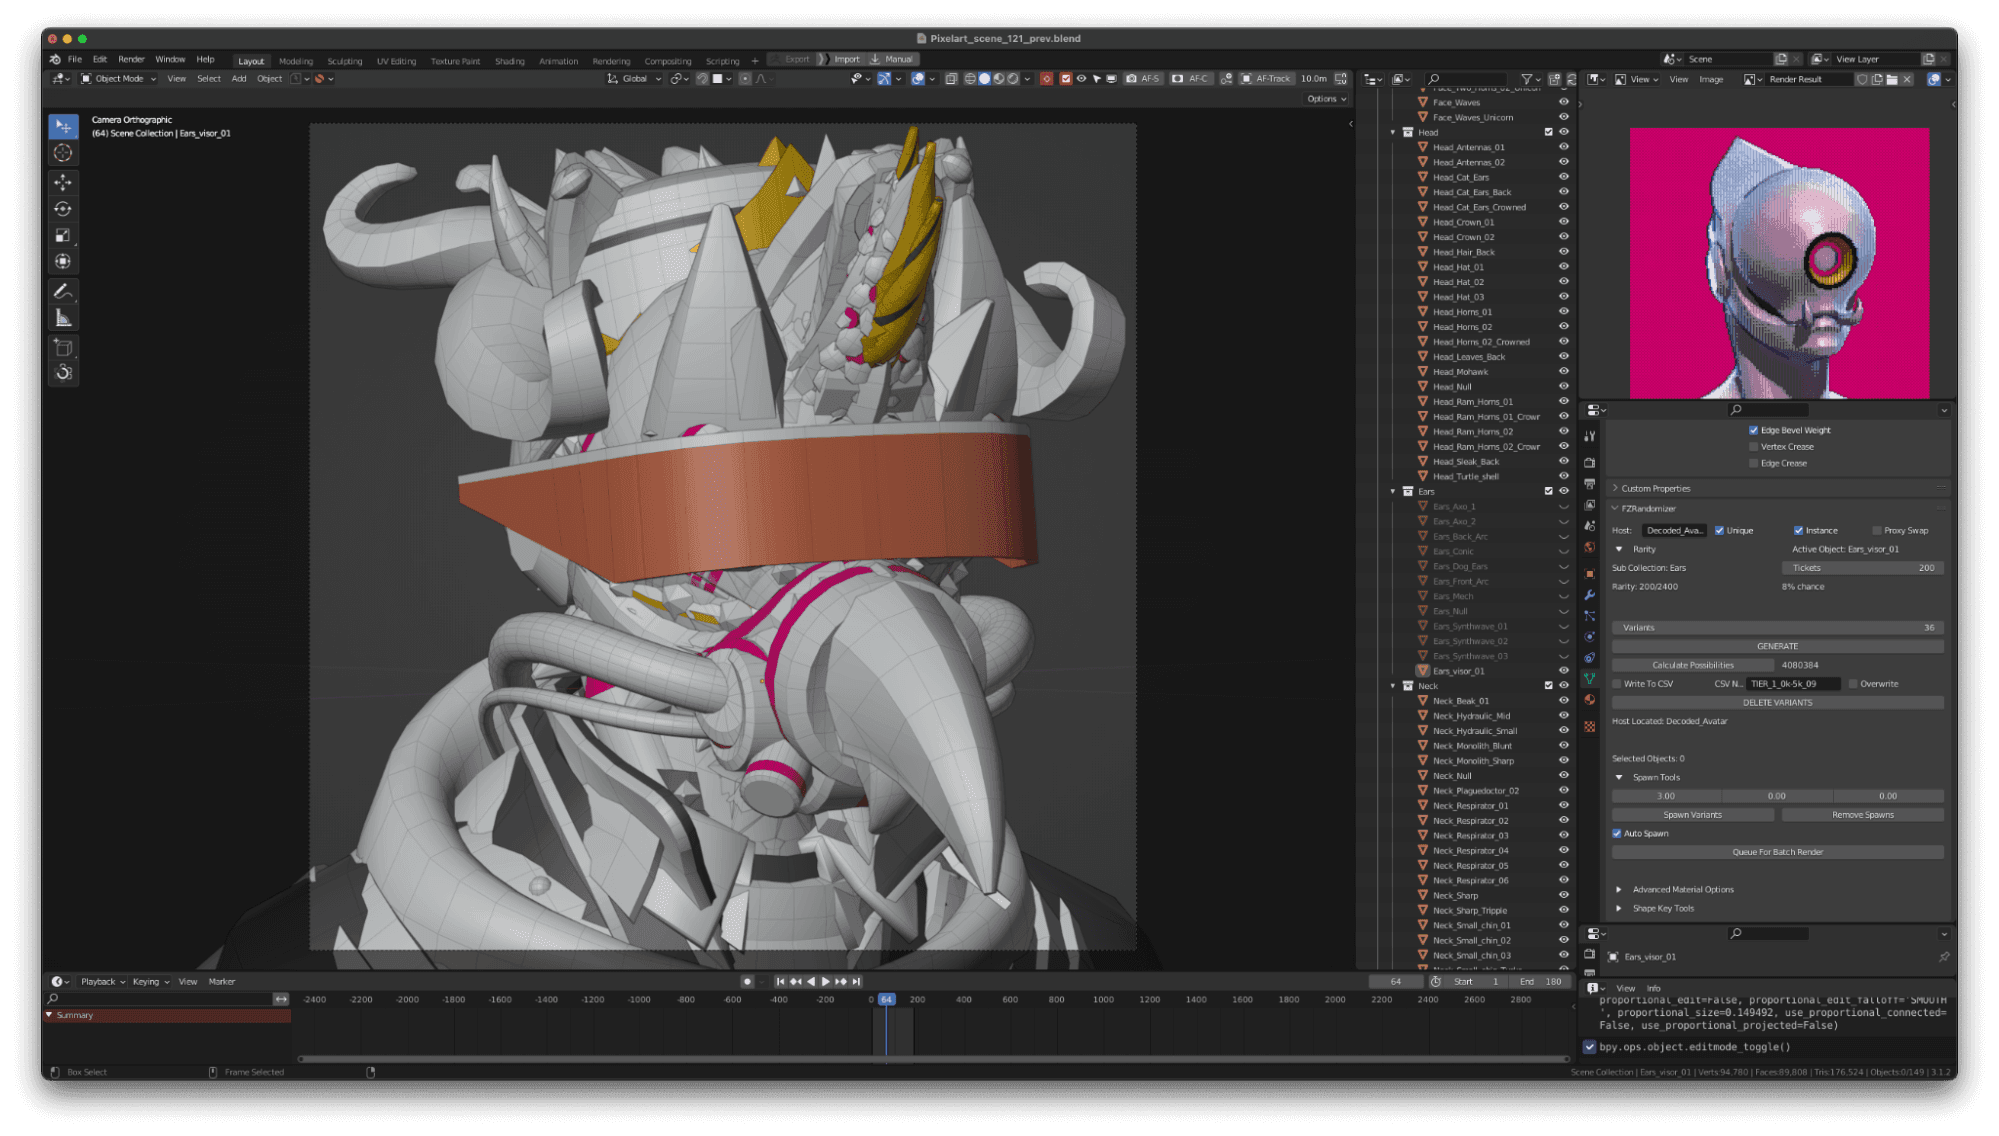
Simon created the pieces with the free, open-sourced tool Blender. While he prefers Houdini as his go-to DCC (Digital Content Creation), Blender turned out to be a great tool for creating modular parts and rendering. Here’s how the creation process looked:
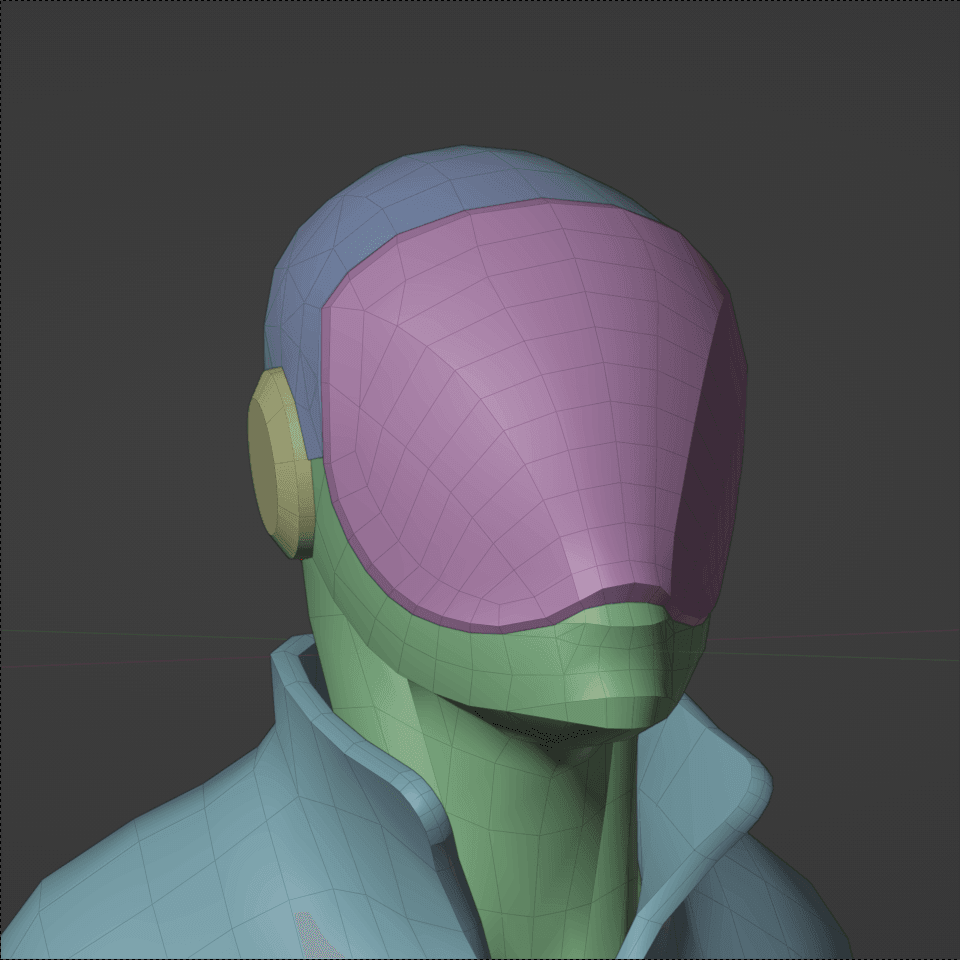
Step 1. Creating a modular system for the characters
Simon started by separating the different parts of each modular droid character:
- Top part with the face and mask
- Bottom part with the chin, neck, and shoulders
- Middle part with the ears, visors, and sides
- Back part of the head
- Clothes
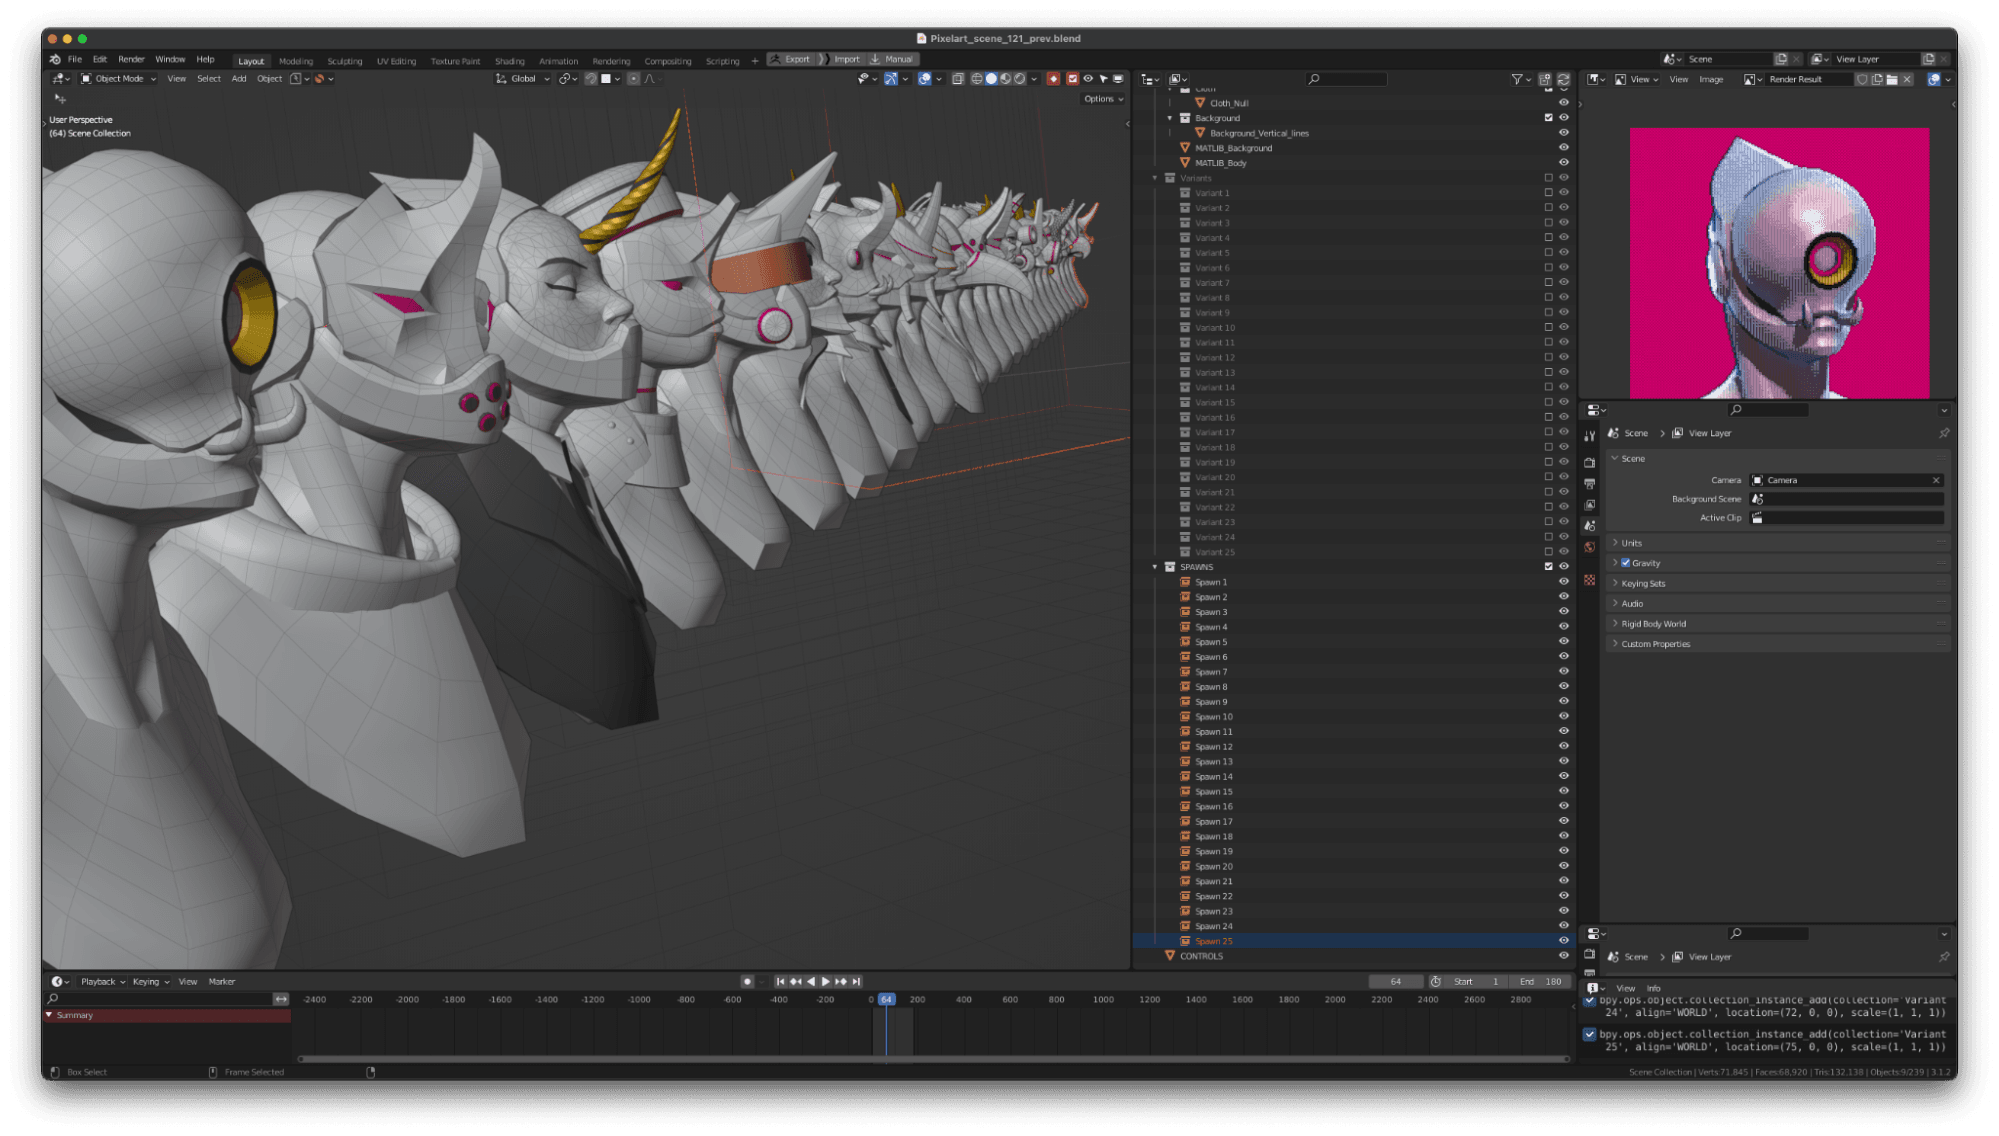

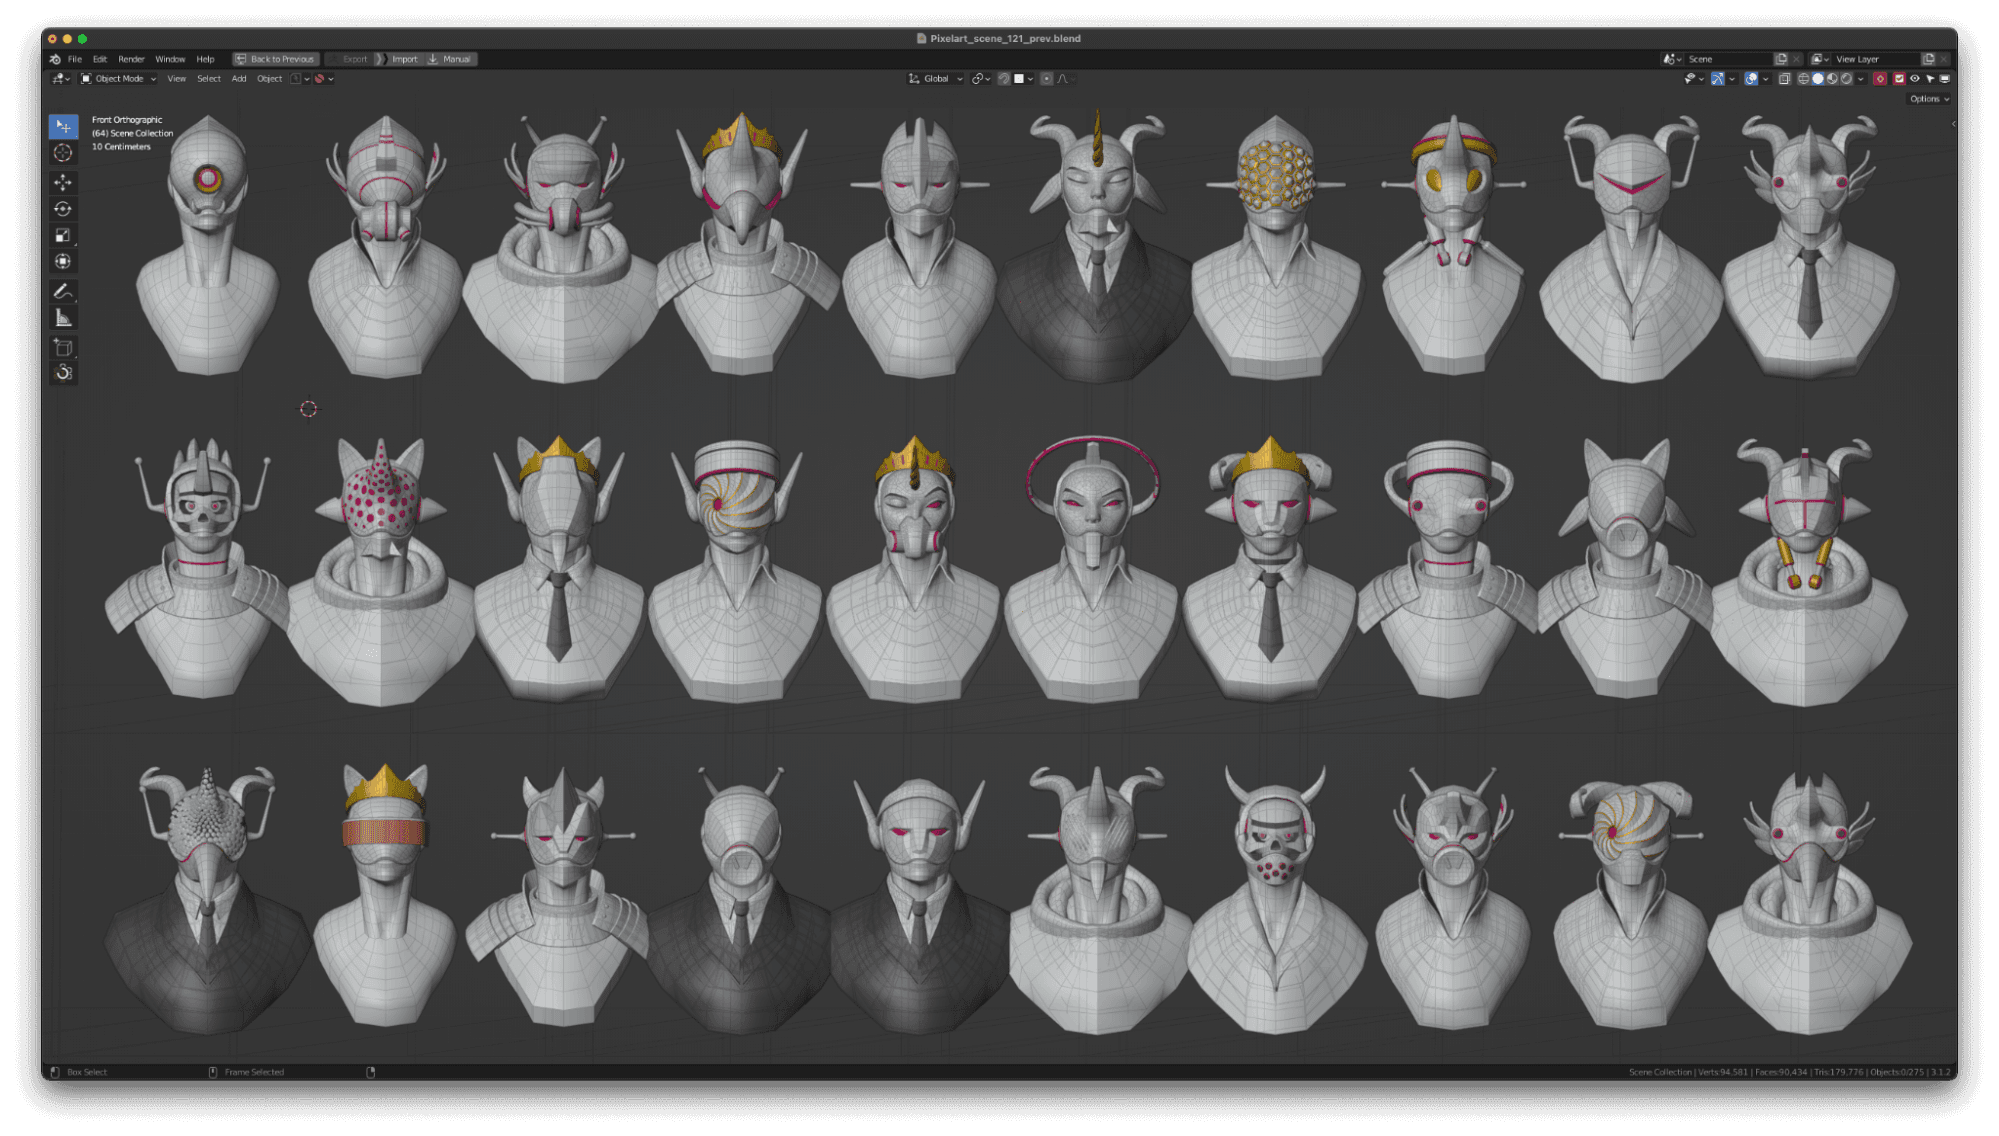
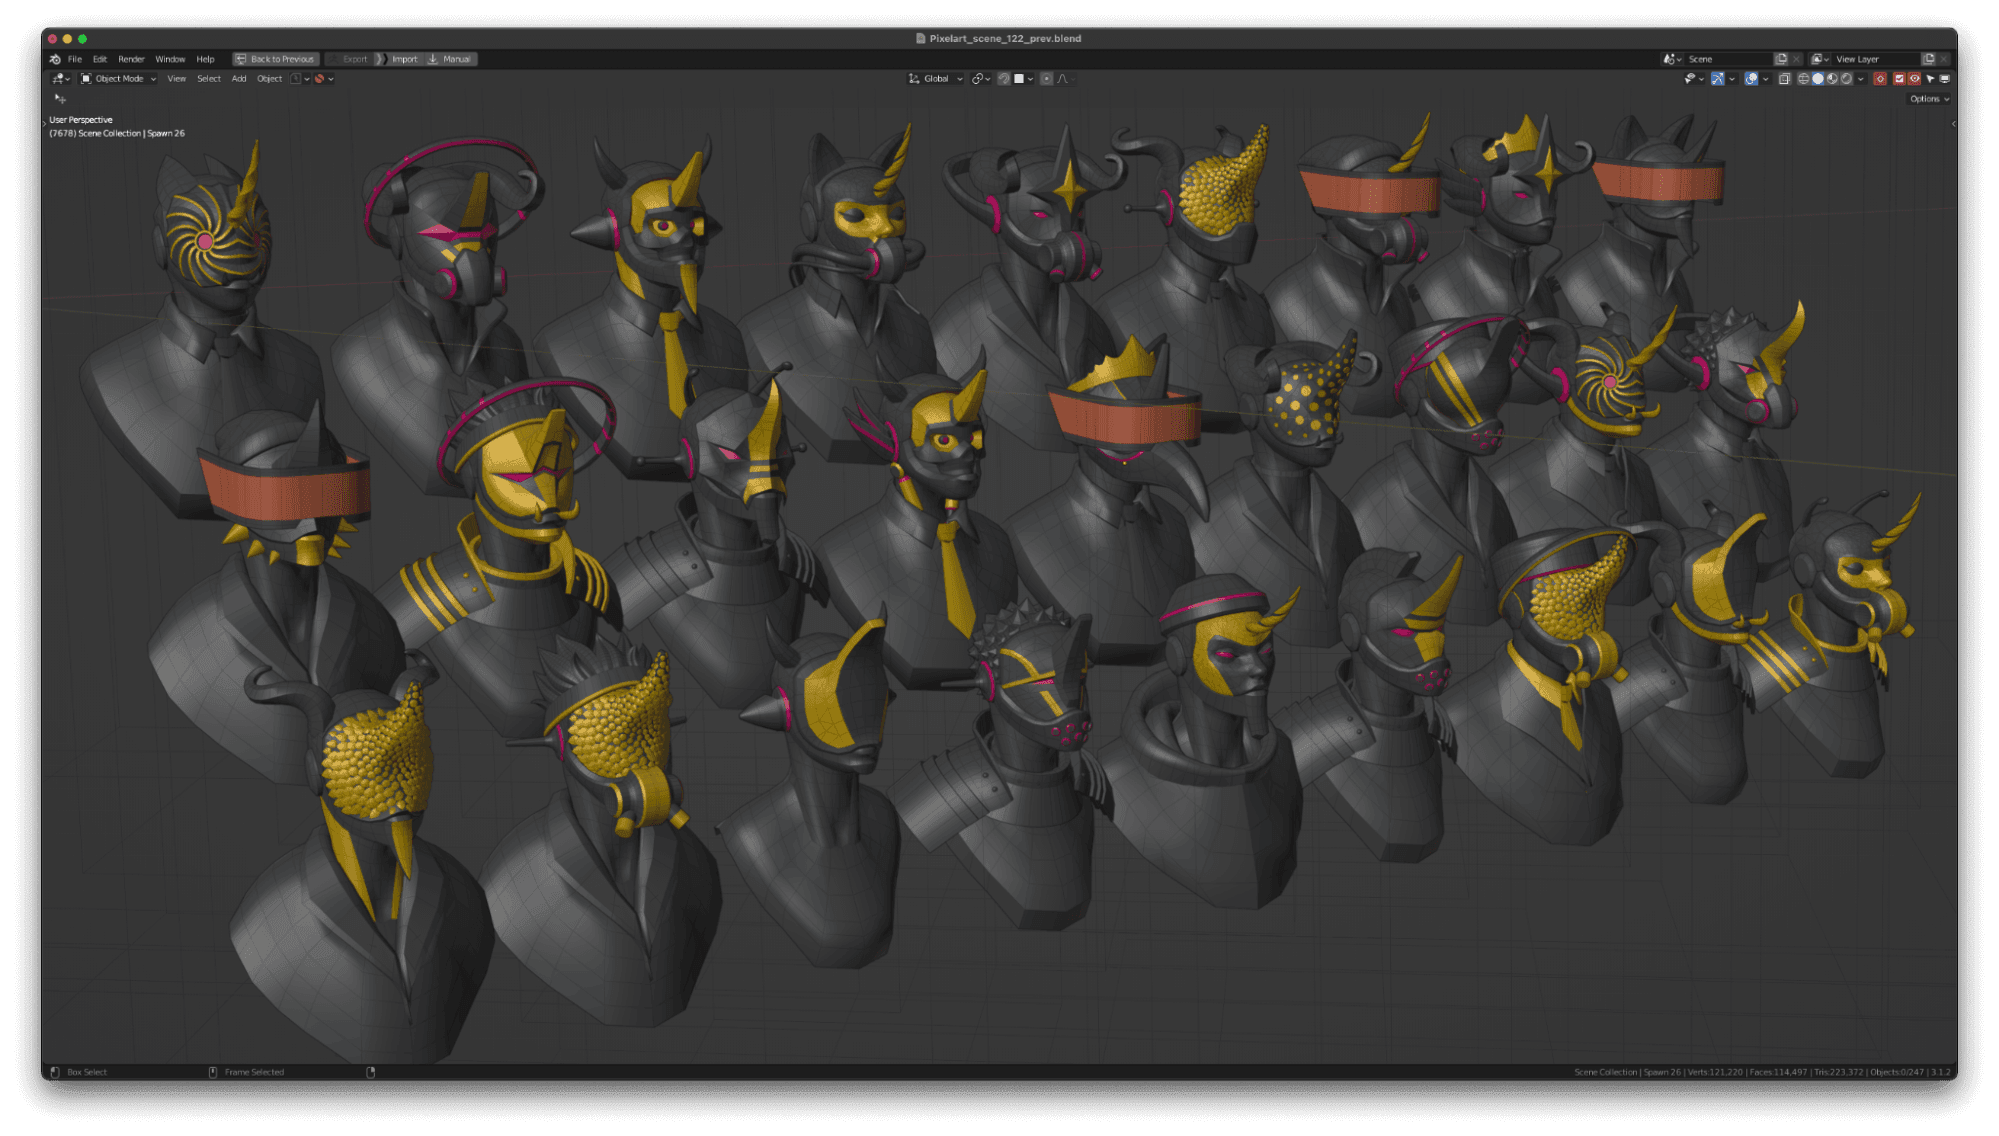
When creating 50K images out of 5 modules, all you need is 9 variations for each module to get (9^5=)59049 variations. However, not every module is created equally. If you only change the ears, hair, and clothes but leave the top and bottom part of the face the same, two versions can look quite similar. As an MVP this works, but Simon was determined to bring more variety in the characters. Which leads us to the next step.
Step 2. Combining all modular parts
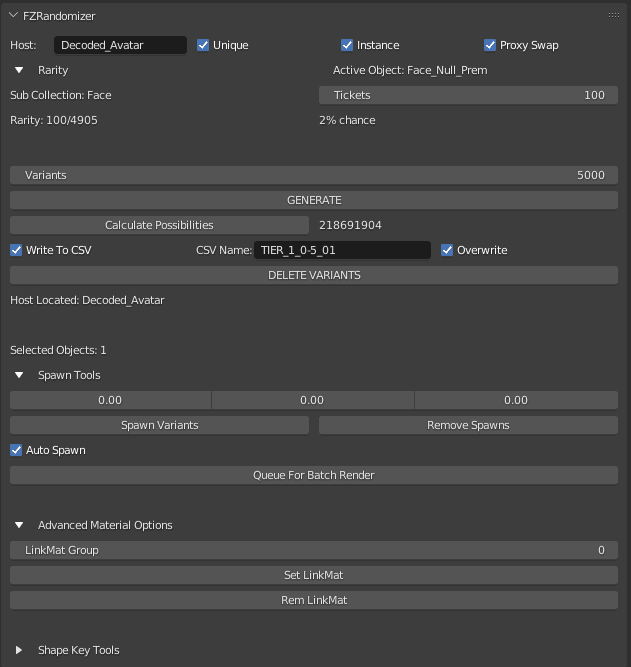
While it’s impossible to manually switch the visibility attribute to multiple objects fifty-thousand times, you can install the plug-in FZRandomizer 3 — a Blender add-on which allows you to randomize characters and other mesh objects. While the plugin lacked stability when working with 50K images, it was fast, able to make JSON files, and to work with probabilities.
Step 3. A bit of YouTube and a bit of open-source
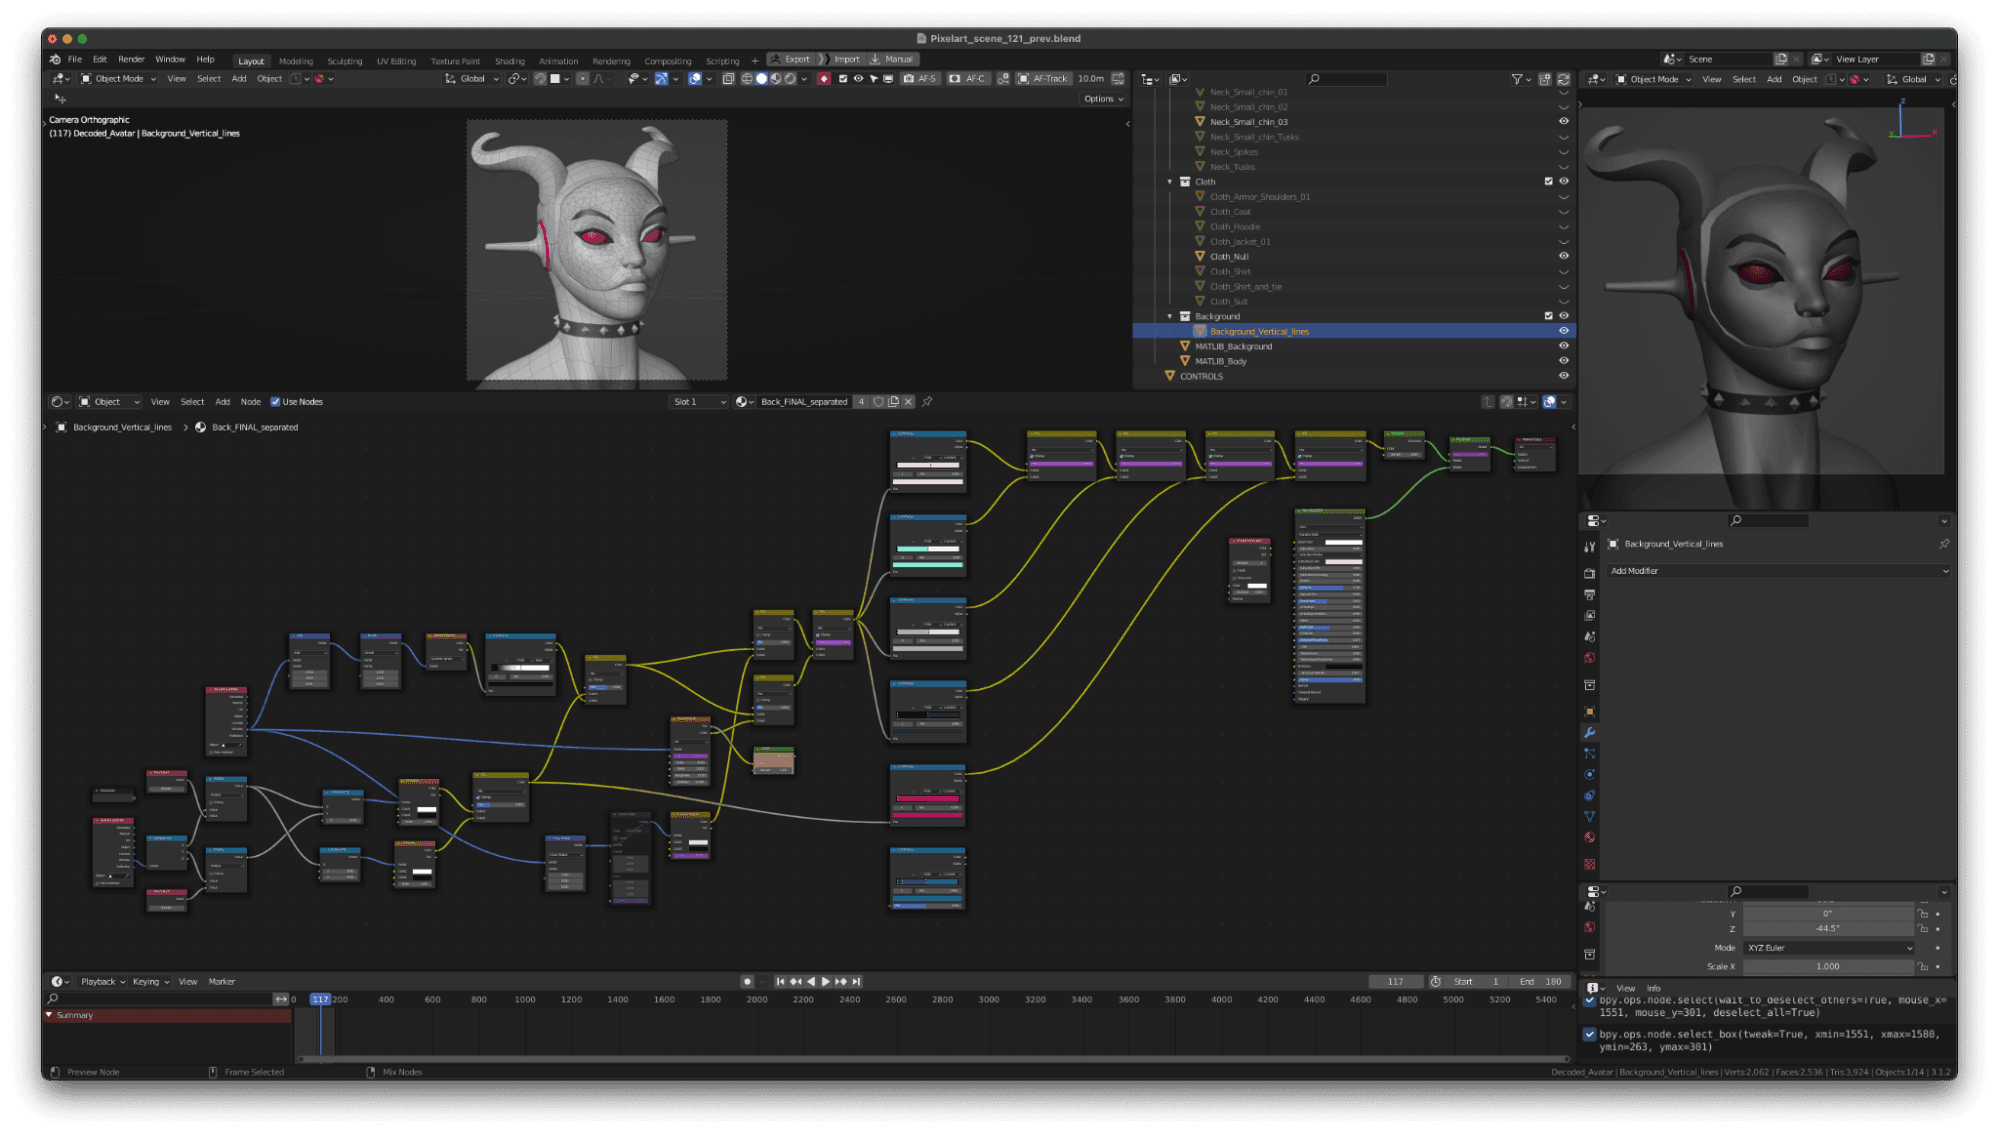
For the rendering, Simon opted for a combination of rendering light in cycles, then converting it to shader data, and then rendering once more. This idea was inspired by this tutorial from Mezaka. While Mezaka’s plugin slowed down after 3000 pictures, open source came to the rescue. With a few changes in the code, Simon was able to rework the shaders, and implement drivers to change colors and materials depending on the frame render.

Pallets, uniques, and more: Setting up the NFT collection
NFTs (short for Non-Fungible Tokens) are unique assets that are not interchangeable, and that can be used to register the ownership of any unique, non-fungible asset on the blockchain ledger. In the Substrate framework, the blockchain module (pallet) that stores and handles NFT assets is called "Uniques” — and it’s a much more secure way of minting.
While most blockchain networks use smart contracts that run on top of the blockchain, in Polkadot, the Uniques pallet is a module composed as part of the blockchain itself that provides basic functionality for creating NFT collections and items. This brings a higher level of security, as there’s only one implementation on the chain which is audited to be secure and already battle-tested by many projects.
In contrast, smart contract-based ecosystems use a separate smart contract for each NFT project. This increases the possibility of errors/backdoors that might have been created during the development, which is why each project needs to be audited and verified separately.
Another great thing about the Uniques pallet is that it’s very easy for anyone to create their own NFT collection on-chain, without much development or relying on third-party developers to build smart contracts (as there’s no need to develop and deploy any smart contracts).
For the Polkadot Decoded NFTs, we went with the Uniques pallet so we could spend all of our efforts on the artworks, and not on developing smart contracts. After all, publishing 50K NFTs was already enough work in itself. Luckily, this wasn’t our first collection of this scale, so we could make use of the automation tools we built for earlier collections (read on to learn more about these open-source tools).
With the Uniques pallet as our pallet-of-choice, the last thing to consider was whether to mint the NFT collection on Polkadot or Kusama. The pallet is currently deployed as a module on common good parachains on both Polkadot (Statemint parachain) and Kusama (Statemine parachain). Kusama turned out to be the most cost-effective option at that time.
💡 Good to know The Uniques pallet intends to provide the core NFT functionality out of the box and lets everyone create their own NFT collection. In the next version of the pallet, “Uniques V2”, more core functionality will be added. The intention is to keep the core functionality in the pallet, which can be extended by community parachains for more customized use cases, such as composable NFTs and gaming. Learn about NFT parachains.
Time for Hamid to mint those 50K NFTs!
After the artworks were ready, it was time for Hamid to mint the NFTs.
When done manually, minting 50K unique NFTs on-chain would be a very time-consuming and cumbersome process. Thankfully, Hamid had a cli tool to automate the entire minting process.
We’ll take you through the manual steps needed to create a collection and mint the NFT items and then show how the cli tool was used to automate the minting process.
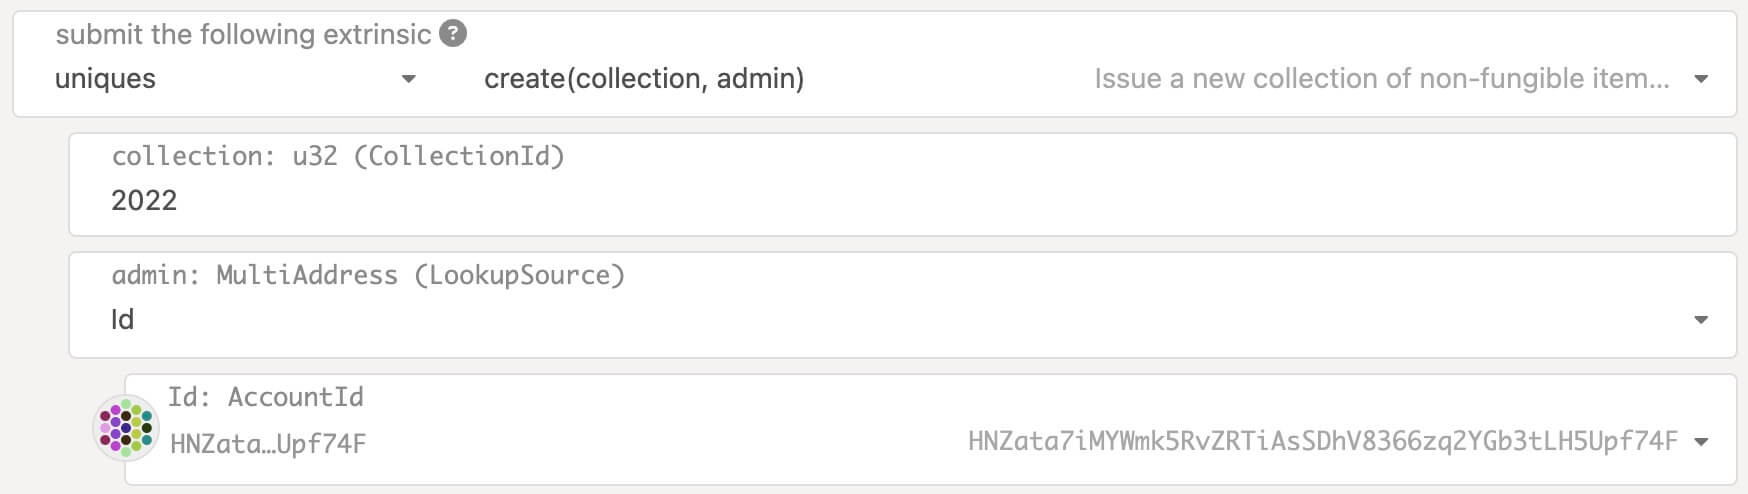
Step 1. Create a collection
Using the Unique pallet, we created a call uniques.create, which creates a collection with a collection id that can be used to mint the items in that collection.
Step 2. Distribute the NFTs
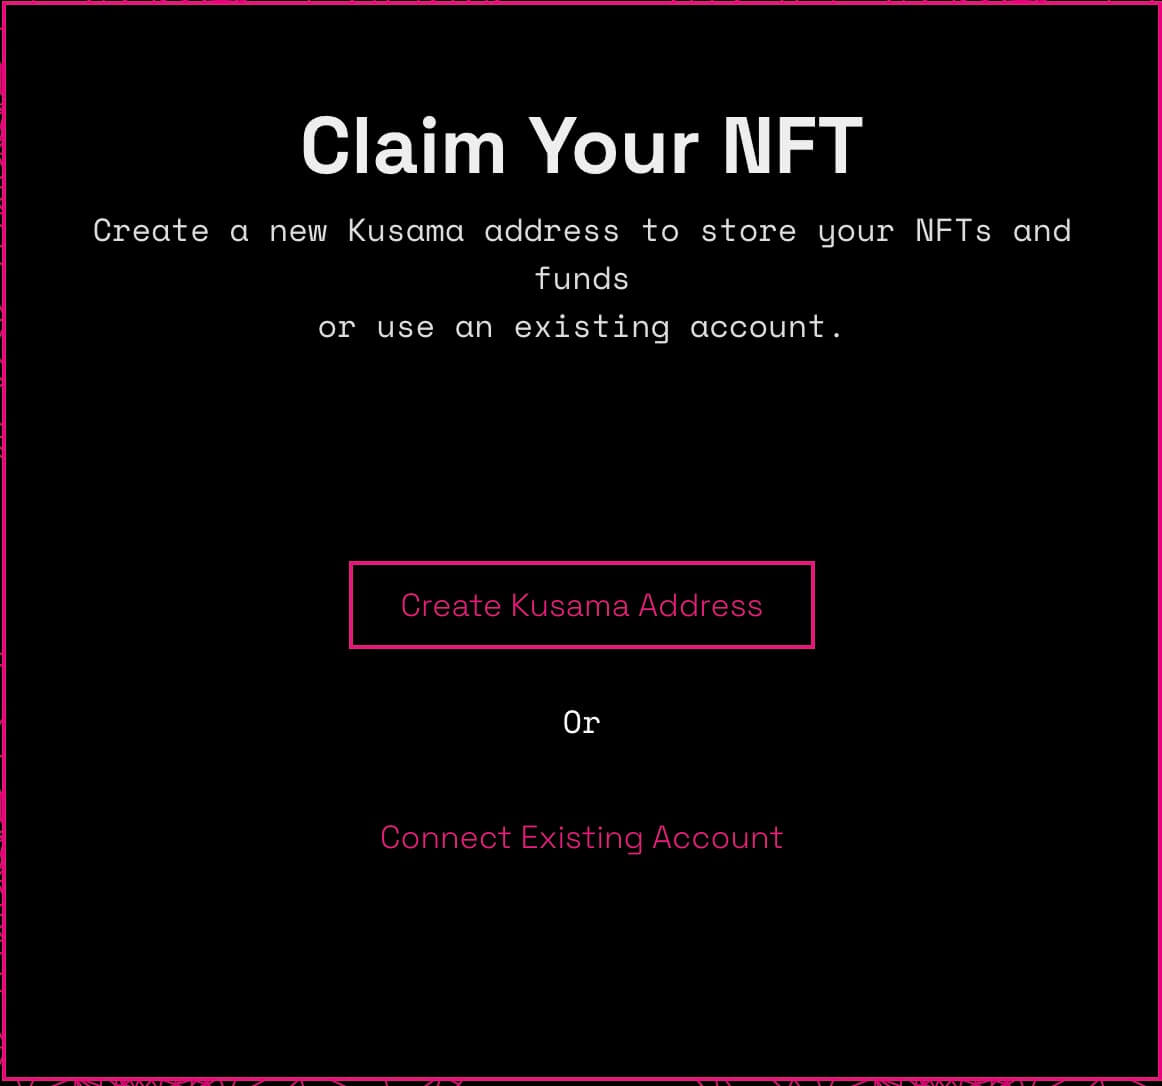
Using the email addresses of all Polkadot Decoded attendees, we could send a secret gift code that people could use on this page to claim their NFT. Each code was made of random numbers (more on the creation process here) used as seeds in keyring to derive the account’s keypairs and their correspondent addresses, which could then be used as the address of the owner of each pre-minted NFT.
Step 3. Mint all NFTs
Using the uniques.mint call, it’s time to finally mint all NFTs. During minting, each item will be assigned to an address. When the NFT secret codes are claimed, the claim app will check whether the corresponding address derives from that secret code and transfer all the NFTs and assets. The claim app either lets the recipient create a new account through the app or select an existing account from someone’s Polkadot-JS Extension or Parity Signer wallet.
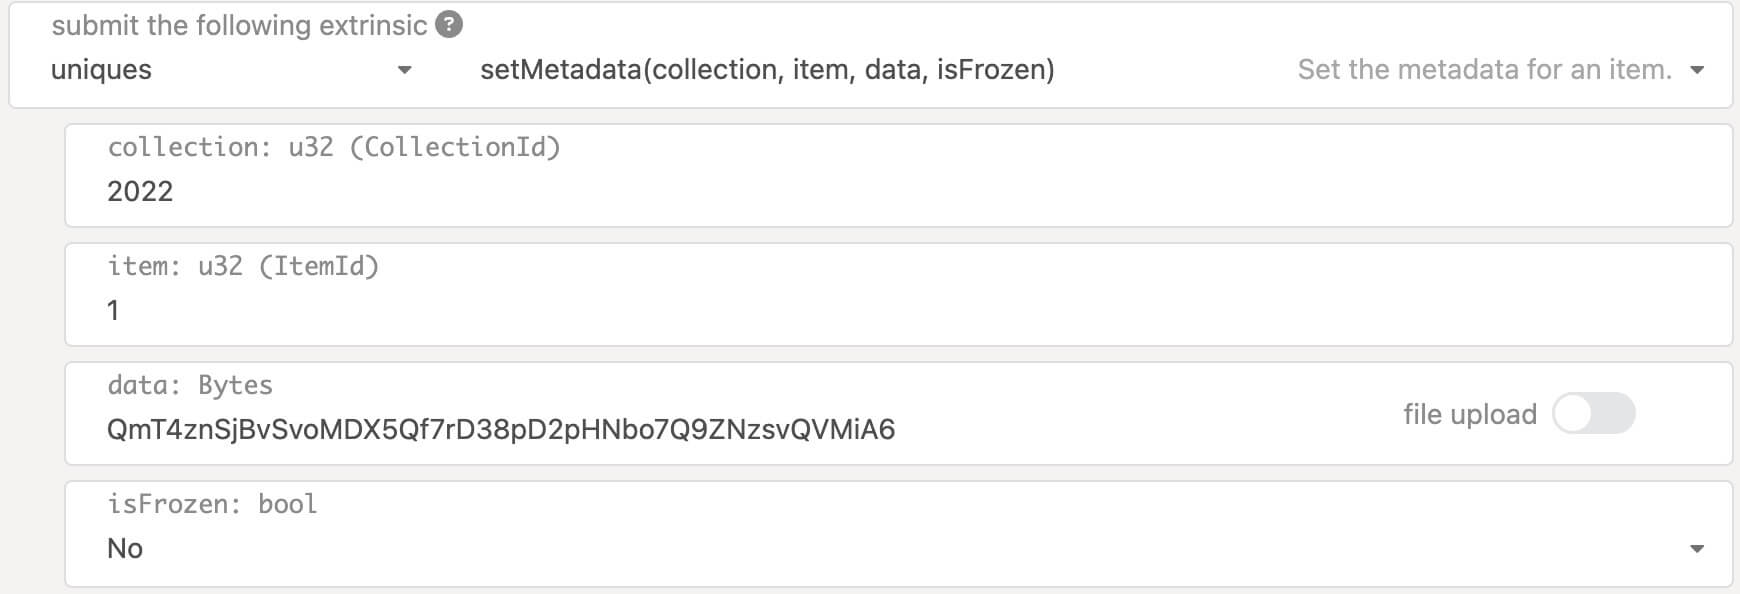
Step 4. Set all metadata
After the NFT items are created (aka minted) on the blockchain, the metadata needs to be set for each item. This metadata links to a JSON file that contains the NFT name, description, and image URL. We used the format below, which is supported by most wallets and UIs.
{
"name": "name of the item",
"description": "A human readable description of the item. Markdown is supported."
"image": "This is the URL to the image of the item. Can be just about any type of image (including SVGs, which will be cached into PNGs by OpenSea), and can be IPFS URLs (ipfs://ipfs/<CID>) or paths.",
}
Step 5. Store metadata safely
To store the metadata and any related assets, we used a decentralized storage like IPFS (InterPlanetary File System). For this collection, we stored the metadata IPFS and used Pinata to pin our assets on IPFS.
Pinning on IPFS refers to the concept that a server, or group of servers, guarantees to always keep information stored so files never get removed from the network.
While IPFS is a decentralized, peer-to-peer storage system and data is cached on IPFS nodes, sometimes nodes may delete the old data to make room for new content. Pinning guarantees that, at any given time, files are available on at least one server (or a few) to be accessible by the IPFS network. You can either host your own IPFS server or use a 3rd-party service like Pinata, which provides pinning as a service.
When storing and pinning assets, you’ll get an address to those files on IPFS. These are called CIDs (Content IDs) and can be used to retrieve the assets through IPFS gateways.
Step 6. Create metadata CIDs
Let’s go through all the steps one-by-one:
- Upload the image for each NFT to IPFS
- Get the CID of that image on IPFS
- Create a JSON file with the name, description and a link to the CID of the image
- Upload that json file to IPFS
- Get the CID of the metadata.json file on IPFS
- Use the Uniques pallet setMetadata call to set the NFT metadata to the IPFS CID.
An example metadata from our campaign:
{
  "name": "Polkadot Decoded 2022 POAPs Tier 1",
  "image": "ipfs://ipfs/QmPotLZPgW9AvNzuNGB24zVqbWY9eP7Sbrzk3KCdydyB66",
  "description": "The Polkadot Decoded NFTs were minted and distributed as POAPs for Polkadot Decoded v3 that was held on June 29th and 30th, 2022, with a fully hybrid experience of online and in-person events. All those who registered were able to claim a one of a kind, unque NFT that they could additionally use as their avatar for the conference. Each tier varied in how rare the NFTs were, with tier 1 being the most rare, then tier 2, tier 3, and so on."
}
When wallets or NFT UIs want to retrieve and present an NFT, they go to the blockchain and find the CID of that metadata.json file, which is stored on the Uniques pallet. Then they parse the information out of it — using the “image” CID to retrieve the actual NFT assets — and present them on the UI.
Step 7. Automate with our cli tool
If all the NFTs were the same, we would just have to set one metadata for the entire collection by calling uniques.setCollectionMetadata. However, for our huge collection we needed to generate and upload 50K images to IPFS, get their CIDs, and generate 50K metadata for each NFT on blockchain by calling uniques.setMetadata.
Doing this manually would have been a nightmare. Luckily, we didn’t have to thanks to our developed cli tool, which automated this process.
How we used the cli tool:
- Put the NFT information in a .csv file.
- Define the mint workflow in a JSON file, which is configured to use that .csv file as datafile.
- Call the cli to run the defined workflow.
These steps automate the entire workflow: from creating the collection to minting items, generating gift secrets and addresses, uploading images to IPFS, generating metadata for each NFT, uploading to IPFS, and finally setting the metadata on a Uniques pallet for each item as described above.
With all of these operations, it would still roughly take a second per NFT to mint so the scripts ran for almost 13 hours all-together! Thankfully it was automated, so the minting was done overnight and ready to be distributed on the first day of Polkadot Decoded!
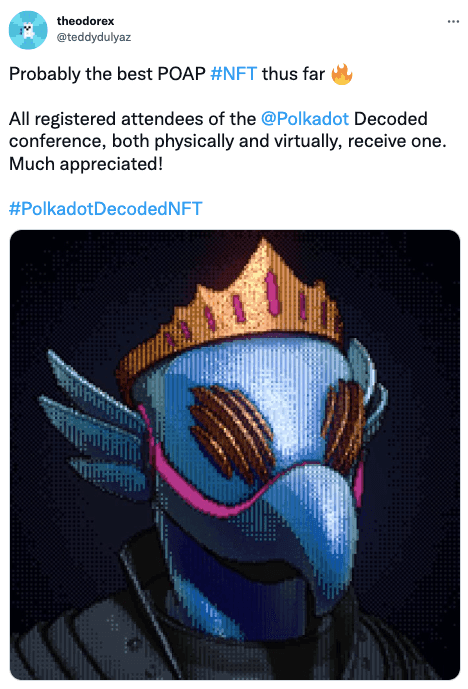
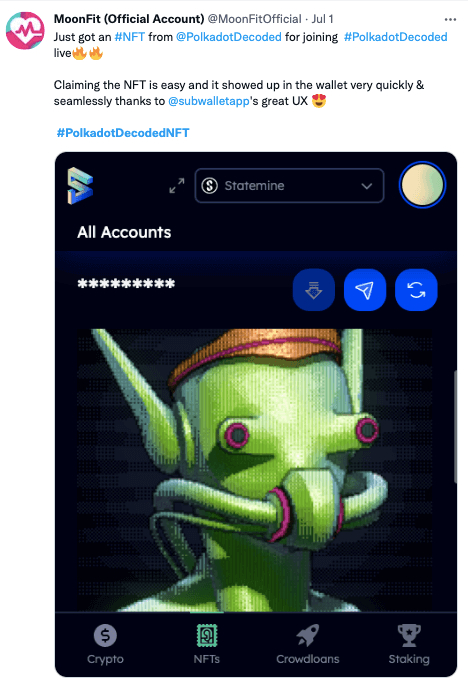
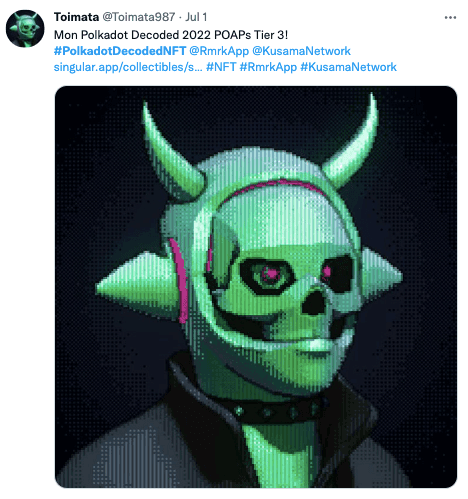
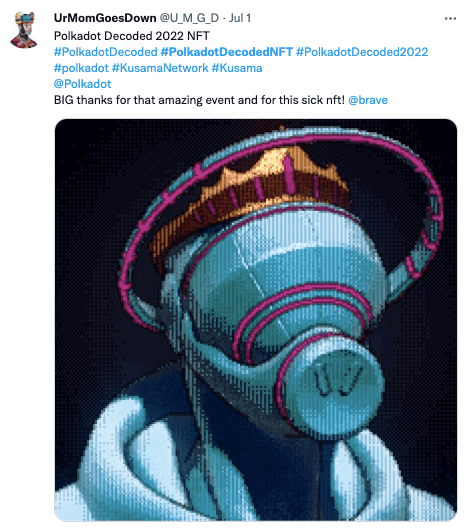
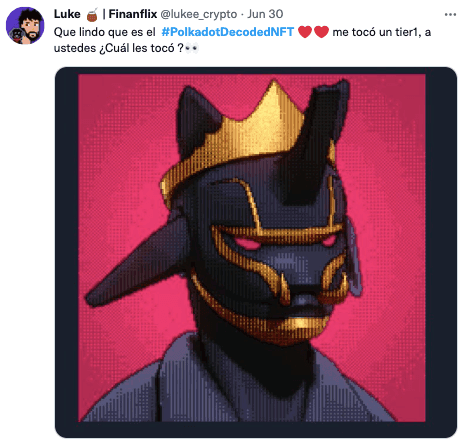
Project completed: Meet the happy owners
After Polkadot Decoded, 25K NFTs in different tiers were claimed — resulting in many happy new owners! The entire collection can be viewed here. Below, you’ll see some of the minted NFTs and their new owners.